Hey there, I’m Jake, and if you run a small shoe brand, a boutique, or even just love showing off your prized kicks at home, odds are you’ve got a ton of empty shoe boxes lying around. As someone who’s been running a shoe box supply company for 7 years (yeah, we make all those sturdy, plain ones you probably toss after unboxing sneakers or boots), I’ve seen firsthand how most of these boxes end up in landfills, and that’s such a waste. Last year, I was helping my cousin set up a pop-up for his handmade leather shoes, and he was complaining that the fancy display cases he’d planned to rent were way over his small budget—like $200 for a single week, that’s nuts. That’s when it hit me: shoe boxes are already built exactly for holding and showing shoes. They’re the right size, the right material, and cheap enough that you don’t have to stress about messing one up. Today, I’m gonna walk you through how to turn a basic shoe box into a dope, functional display case—no fancy tools, no special skills required. And yeah, I’ll throw in some pro tips from my side as a box supplier, because I know which boxes work best for this kind of project. Shoe Box
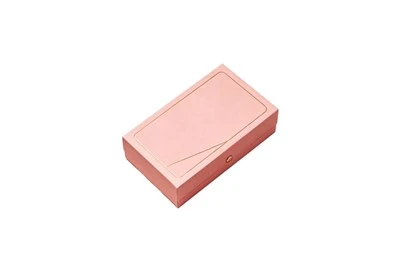
First off, let’s talk about picking the right shoe box. Not all boxes are created equal, okay? If you’re making a display for a pair of sneakers or casual boots, go for a standard corrugated cardboard box (that’s the kind with the wavy inner layer, super sturdy). We supply these by the truckload, and they’re perfect because they hold their shape even when stacked, and you can cut into them easy without them falling apart. Avoid the thin, flimsy mailer boxes—those bend if you so much as touch ’em, and your display will look like garbage. Also, size matters: if you’re showing high heels or ankle boots, grab a slightly taller box; if it’s running shoes, a standard men’s size 10 box works like a charm. Pro tip from my team: if you’re using our pre-labeled boxes (we do plain unlabeled ones too, no logo), peel the label off slowly with a hair dryer set to low heat. The adhesive won’t leave a messy residue, and you won’t tear the cardboard. Way better than scraping with a knife, which can leave marks you’ll have to cover.
Next, prep your workspace. You don’t need a fancy studio—just a table, some old newspapers or a plastic mat to catch mess, and basic tools you probably already have at home. I use: a box cutter (not a exacto knife, those slip way too easy), a ruler or a straight edge (so your cuts are straight, no lopsided boxes), sandpaper (fine grit, like 220, to smooth edges), a pencil, and some white glue or double-sided tape. Wait, and if you want to add lights (trust me, this game changes), grab a strip of battery-powered LED lights—no wiring, so no electrician needed. We actually keep a little bundle of these in our supply shop because so many of our customers ask about display hacks, and they pair perfectly with our boxes.
Okay, let’s get into the actual build. First step: cut the top flaps off the box. Wait, not all the way—leave a 1-inch border along the back and the two sides. Why? That border acts like a little shelf ledge, so when you set a shoe in, it doesn’t slide right out. If you cut all the flaps off, your shoe will tip over, and you’ll spend the whole time repositioning it. So use your ruler to mark 1 inch from the back and side edges, then use the box cutter to carefully cut along those lines. Go slow, don’t rush—if you snarl the cardboard, you’ll have to fix it with a little extra tape, which is a hassle. Once you cut the flaps, smooth the cut edges with that fine sandpaper. You don’t want sharp cardboard bits poking you or scratching your shoes, right? Also, if the edges are a little rough, sanding them makes the box look way more polished, like a real display, not a middle school craft project.
Now, if you want to customize the box—this is where you can make it fit your brand or your personal style. For small businesses, this is key because a custom display makes your shoe look more premium. Let’s say you’re doing a matte white sneaker display: paint the inside of the box matte white with acrylic paint. It doesn’t take much—one thin coat is enough, and it dries in like 30 minutes. If you want to add a logo or a pattern, use stencils or adhesive vinyl (way easier than freehand painting, trust me). For home use, if you’re showing vintage sneakers, leave the cardboard natural, or add a layer of brown kraft paper inside for a vintage vibe. Pro tip from our box team: if you’re painting the outside too, use a primer first so the paint doesn’t flake off the corrugated surface. We test all kinds of coatings on our boxes, and primer makes a huge difference—no one wants a display case that starts peeling after a week.
The best add-on? The LED strip lights. I can’t stress this enough—even a $5 strip makes a shoe pop way more than normal room light. How to install it? Stick the strip along the back inner edge of the box, right behind where the shoe sits. If you left that 1-inch border on the flaps, you can tuck the battery pack into the little gap at the top of the box, so it’s hidden. No wires hanging out, no ugly battery pack on display. We sell these LED strips in warm white, which is perfect for shoes—cool white can make leather look flat, warm white makes the color pop. If you want to get fancy, add a tiny mirror to the bottom of the box. Cut a piece of small craft mirror (or even a mirrored sticker sheet, way cheaper) to fit the bottom of the box, glue it down. It makes the shoe look like it’s on a runway, and you can see the sole too, which is a nice touch if you’re showing off a limited-edition sneaker with a cool sole design.
Wait, what if you want to stack these display cases? That’s why the sturdy corrugated box is non-negotiable. If you build multiple, you can cut the bottom flaps of the top box so they sit on the 1-inch borders of the bottom box. No need for extra stands, and they take up half the space of regular display cases. My cousin used this exact trick for his pop-up—he made 12 of these, stacked them in two rows, and his display looked way more professional than the other guys’ rented wooden cases, and it only cost him like $20 total for the boxes. That’s a win.
Now, some common mistakes people make when doing this. First, cutting too much of the flaps off. I see this all the time—they snip all the flaps off, and the shoe slides right out. The 1-inch border is non-negotiable. Second, using the wrong adhesive. Hot glue melts over time, especially if you’re setting this up somewhere warm like a store. Use white glue or double-sided acid-free tape, which is better for keeping the cardboard from warping. Third, not sanding the edges. Sharp cardboard can scratch leather shoes, and no one wants a scratched $300 sneaker because they skipped this step. Fourth, overcomplicating it. You don’t have to add 10 different things—sometimes a plain white box with an LED strip is all you need to make the shoe stand out.
A quick note for small business owners: if you’re making a bunch of these, you can get bulk boxes from us for way cheaper than buying at a craft store. We supply standard shoe boxes, unlabeled, in bulk quantities, so you can stock up for your next pop-up or market. Display is everything when you’re selling shoes, and these cases are way more memorable than a plain table. Customers love that you’re reusing something that would’ve been thrown away—sustainability is a huge selling point right now, and you can mention that on your social media too, which gives you free marketing.
Wait, also—for home use, if you’re a sneaker head, these display cases are perfect for showing off your grails without them getting dusty. You can even leave the top flaps on partially, so it’s closed enough to keep dust out, but open enough to see the shoes. I have a pair of my dad’s old work boots that I restored, and I made a display case with a natural cardboard box, sanded edges, and a little LED strip. It’s on my bookshelf, and everyone who comes over asks about it. Way cooler than putting them in the back of a closet.

So, to wrap this up: you don’t need to spend a ton of money on fancy display cases. A basic shoe box, some simple tools, and a little creativity is all you need. For small businesses, this is a budget-friendly way to make your products stand out. For home crafters, it’s a fun weekend project that gives you a custom display for your favorite shoes. And if you’re in the market for bulk shoe boxes to make these display cases (or just to package your own shoes), hit us up to connect on purchasing. We’ve got all sizes, sturdy corrugated ones, plain unlabeled, whatever you need, and we can work with your budget.
Paper Bag References:
- Sustainable Packaging Coalition. (2022). "Corrugated Cardboard Applications for Retail Displays." Retrieved from industry packaging guidelines for small businesses
- DIY Network. (2021). "10 Easy Shoe Display Hacks Using Household Items." Retrieved from home improvement project archives
- LED Lighting Manufacturers Association. (2020). "Best Lighting for Small Retail Displays." Retrieved from commercial lighting resource guides
- The Sneaker Report. (2023). "Budget Display Solutions for Collectors and Small Sellers." Retrieved from niche retail and collectible resources
Dongguan Jinying Printing Co., Ltd.
As one of the most experienced shoe box manufacturers and suppliers in China and Vietnam, we also support custom service and OEM service. Welcome to buy bulk luxury shoe box at competitive price from our factory. If you have any enquiry about cooperation, please feel free to email us.
Address: No. 5, 1st Road, Jingshan Third Industrial Zone, Chashan Town, Dongguan City, Guangdong Province
E-mail: inquiry@dg-jinying.com
WebSite: https://www.gpspacking.com/
